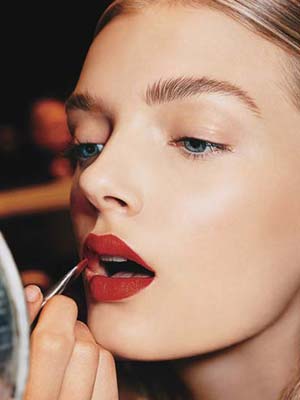
I am a huge fan of a bold red lip or any red lip for that matter! But sadly, I have found over the years that many women are intimated by the even thought of wearing it. So, I thought I'd share my fool proof way of applying RED lipstick. Below are 9 easy steps to the perfect application. No more excuses!!

1. First you must pick the right color for your skin tone: Skin with yellow undetones looks best in orangey-red lipsticks or red lipsticks with a golden base. If you have an ultra milky complexion that rivals Snow White, chances are you also have cool, rosy undertones. As a general rule, pinkish skin calls for a red lipstick that is blue-based. Those with olive skin can wear fire-engine red. Dark skin looks great with deep reds. If you are unsure of your skin tone just go to a makeup counter and ask them to recommend you 5 or 6 red lipsticks, then try them all on. I'm sure you'll find the color that looks best on you!
2. Now to the application part! When I'm applying red lipstick on me or my model I always make sure the lips are nice and moist without any dry, flakey skin. If the lips are dry and flakey the red lipstick will just make it more noticeable. I will begin the makeup application by adding a heavy lip balm and letting it sit while I do the rest of the makeup. Then I will take a disposable toothbrush and brush off the excess skin. Lastly I will take a tissue and dab off any extra lip balm.
3. I like to add a thin layer of foundation or concealer to the lips and wait until it dries. This will help keep the lipstick on and prevent it from bleeding. You can also dab face powder over it to make sure the color will last longer
4. I then choose a nude or skin-colored lip liner to make sure I don’t end up having two-toned lips. This is a great way to see if you have uneven lips and correct them.
5. After outlining the lips I will smudge the nude lip liner a bit to achieve more natural look.
6. This next tip I always do but you can get away with just a nude lip liner if you don't have a matching red lipliner. I take a red lipliner, usually the same shade or darker than the lipstick I'm applying, and re-line the lips filling them in completely. This will ensure a longer lasting lipstick.
7. Now comes the fun part! Apply the red lipstick with help of lipstick brush! You will have just the right amount of product and more control in the application. My all time FAVORITE lip brush the the #2N Lip Brush from Makeup Forever. It works with both thin and full lips and has the perfect angles. Start at the center of your lips blending color to the sides of your lips.
8. This is something I've added to my steps only in the last 3 years that has made a HUGE difference in my red lips. I take a thin, natural bristled brush or concealer brush and gently apply a cream concealer (a shade slightly lighter than the skin tone) to the outsides of the lips and blend it well. This will not only keep your red lipstick in place, it will make them pop that much more! Trust me on this one!!
9. Lastly, press a clean tissue to your lips and get a second coat to make sure color stays long enough. To make your lips fuller add a brighter lipsstick color to the center of your lips and then add a lip gloss mostly in the center to finished the look.
Thats it! I know it may seem like alot but your lipstick will last and will look picture perfect!!